Thursday, November 5, 2015

Teen Titans - Robin's Pants

A lot of my time designing Robin's outfit was spent on trying to figure out ways to hide her curves and create a more believable cross-play. I learned that diagonals do a great job of hiding curves, so I wanted to incorporate them into the pants as well as the jacket.

I started with a basic pair of army green pants from the local thrift shop.

Pretty boring, right?

I wanted to give them a more "cargo-esque" look, so I added three decorative horizontal seams. This served a dual purpose, as I also needed to shorten the pants. I slit the sides of the pants open because I knew I was just going to cover it up with a panel later.

With the sides cut out so I could sew the seams.

Close-up of the top stitching.

For the side panels, I didn't want to do just plain chevrons again, so I started looking for inspiration in Robin's other costumes. Well, the Nightwing logo is kind of like a chevron shape! I'll used that!

A decision I would come to regret.

I created a pattern based on the logo, adjusting it slightly so that when the pieces were layered, the head of the bird was still visible. 

Prototype pattern pieces

Of course, the birds would need to get smaller as the leg tapered...

Final pattern pieces, various sizes.

I cut out all the pieces... (Later I would realize that because of the knee-high boots, I would only need half the pieces I cut out).


I didn't have enough green from the jacket, so I cut half the birds out of black pleather and painted then with emerald green leather paint.

Then, in a fit of insanity, I top-stitched ALL the edges. Of ALL the birds.

Slooooow progress

One bird down!

More birds...

The pleather liked to stick in my machine, and the leather paint only made the stickiness worse. It was a frustrating process, to be sure. Some birds were definitely destroyed in a fit of rage...

Alternating bird colors...

I wanted the panels to be flexible, so I chose to only sew them together on the sides. I used some leftover fabric to make piping to go along the seam where the birds connected to the pants.

Adding piping

I sewed each panel back into the pants, adjusting as I went along to improve the fit of the original pants.
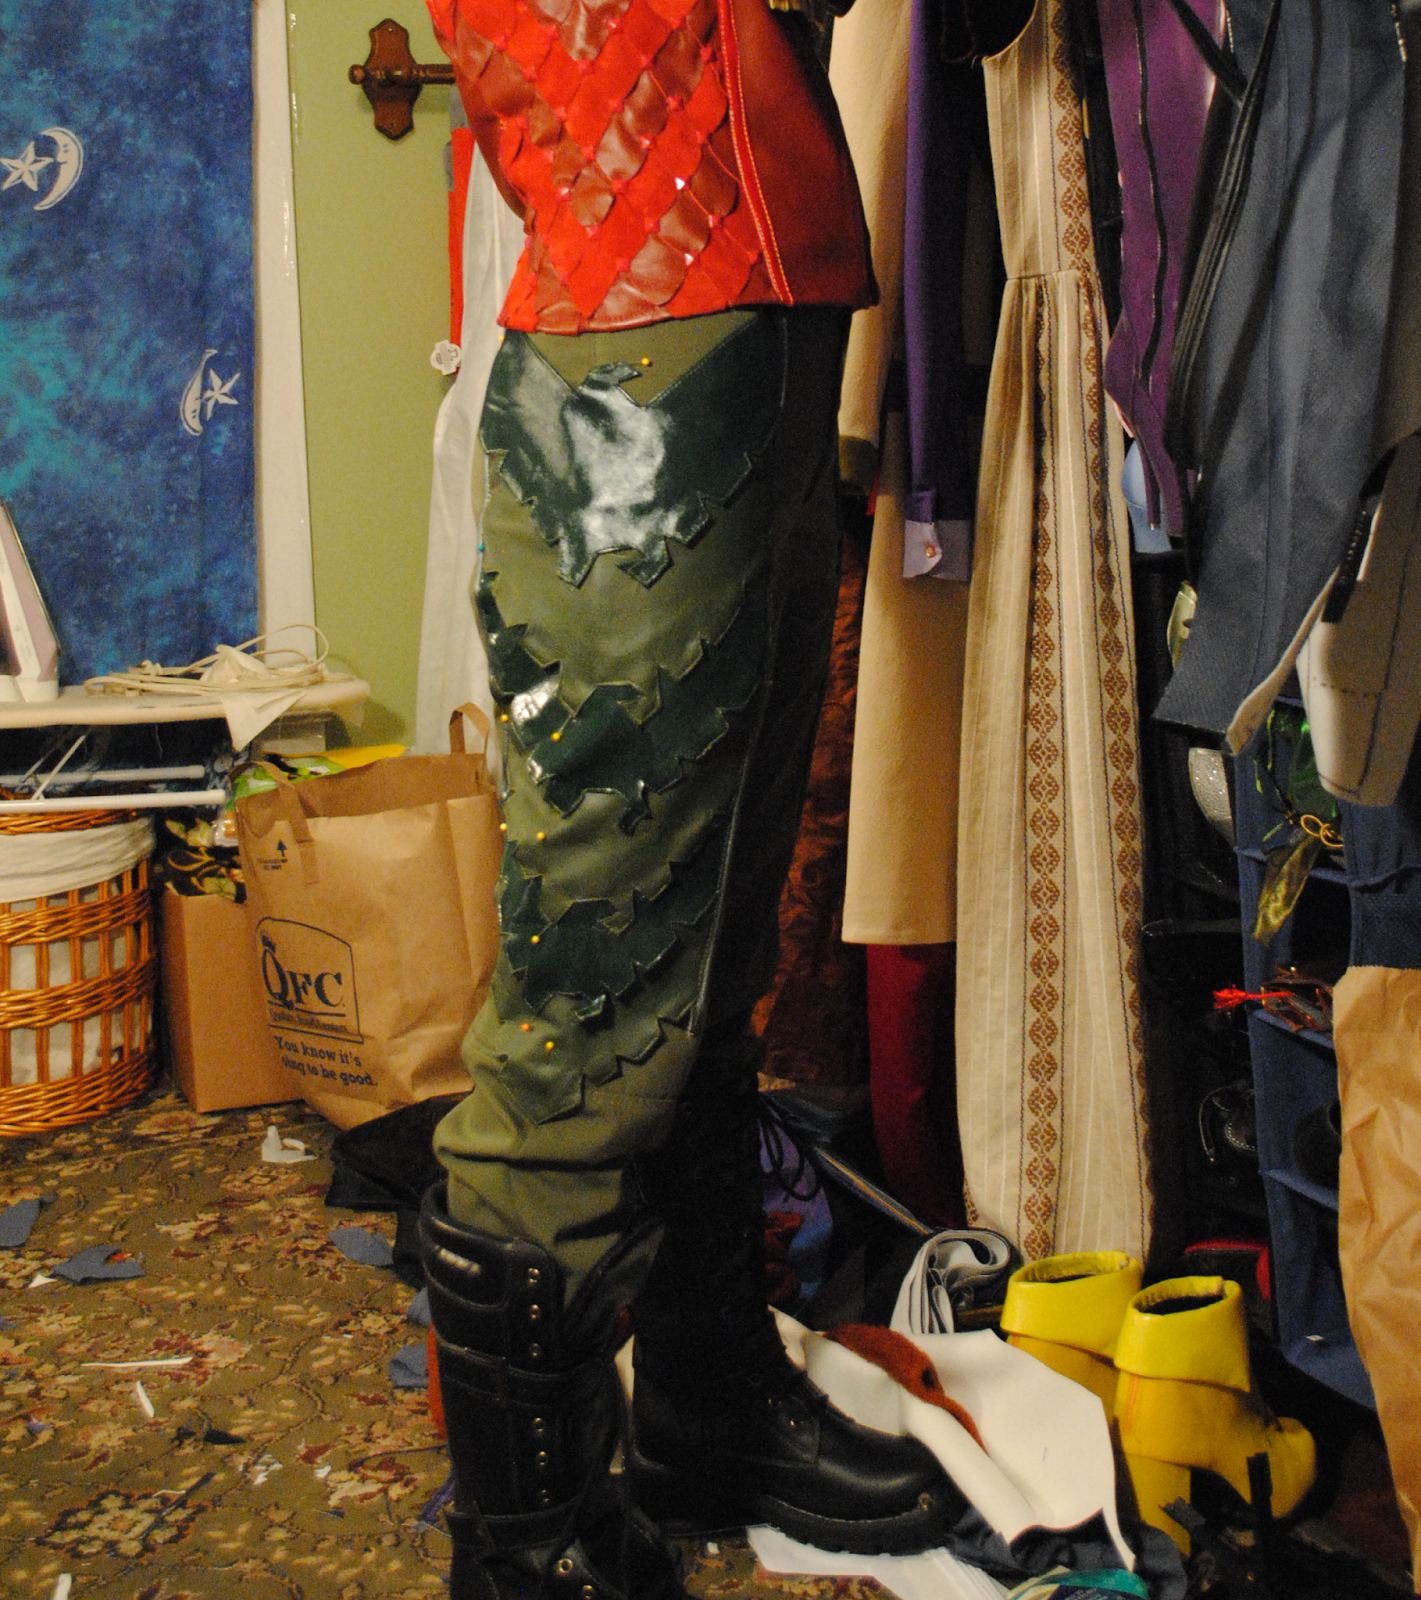
Pants fitting!

I did end up tacking down the birds in a handful of places so they didn't flap around so much, and then I was finally done!


Friday, October 16, 2015

Teen Titans - Raven's Leotard

For Raven's leotard (unitard?) I really, really wanted to steer clear of the spandex dance unitard look. I choose to make it from pleather, both to match everyone else and to be more flattering than clingy spandex. I was lucky enough to find a soft, stretchy pleather in a beautiful slate blue.

The first thing I did was find a free bathing suit pattern. I was worried about drafting the butt/crotch area from scratch, so I picked a french cut swimsuit to base my pattern pieces on.

Taping my printed pattern together.

I cut all the pieces out from a scrap section of blue non-stretchy cotton. That way I could adjust the pattern as needed without ruining my good fabric. (Plus, I could use it for the lining!)

Adjusting the original pattern

As you can see, I extended my pattern pieces so that the leotard would have a high neckline. Once I had the fit the way I wanted it, I used my lining fabric as a pattern and cut out all my pleather pieces. 

I cut the sides out from black pleather...

...and the front from my slate blue.

I wanted to add a little more texture to certain panels of the leotard, so I bought some black tulle with and laid it over some of the blue fabric. 

Looks more badass now

I used some leftover shiny black pleather to create piping to go between the panels.


Don't forget to clip your curves so they lie flat!


Added some top-stitching to all the seams...

With all the different textures and piping

I used a big industrial zipper to hold it together in the back, with an overlap of fabric to cover it. I didn't worry too much about it being "pretty," since I planned on wearing a cape. Also zippers are my bane.


Now I actually had something I could properly try on, which meant it need last minute fitting adjustments. Multiple times.... >.<

Fitting something tightly when the fabric has as little give as my pleather did is a long process. Don't be disheartened! Use big stitches until you're sure you like it, and keep trying! Also, don't top-stitch too early, or you'll be doing what I did and pulling out three seams for every one you want to adjust. T_T

Finally, the fit was good!

Almost done!

The last things I wanted to add were some additional panels over the shoulders.

Edging the panels with piping

Don't forget top-stitiching!

 I positioned the panels so that the lines drew upward and inward toward the neck, creating a focal point for her neck gem (and hopefully minimizing the width of my shoulders).

From the front...

...and the back.

With some trim to finish the edges of the neck and the armholes, it was (basically) done!

Just needs gems!

Lastly, I had to trim the thigh curve to the right height, and stitch the crotch together. This was one of the absolute last things I did before the con (like, I think it was Saturday morning at 9 AM) so there are no pictures of that.

But there are plenty of the final leotard in action!

Photo credit: South of Autumn

Wednesday, October 14, 2015

Teen Titans - Beast Boy's Gloves, Boots, and Animal Accessories

My original Beast Boy design looked like this:


I wanted to stick with his color scheme from the Teen Titans cartoon, while bringing in more details (y'know, the usual). I wanted to keep a realistic look to the outfit, especially with what I had done with Robin's jacket, so I choose to paint his boots and gloves rather than making them from scratch.

For the boots, I used an ancient pair of motor boots I had lying around. Honestly I had meant to throw these out years ago, and had put them by the back door and forgotten about them. It's not hoarding if you eventually use it!

Old and gross

The first step was cleaning the boots: first with soap and water, then with rubbing alcohol on all the areas I was going to paint. I re-polished the black areas with black shoe polish to make them look nice and shiny. (Oh, plus gluing the soles back together since they were literally falling apart).
I used a cotton ball to paint the tongues with silver acrylic, so I could do a light coat but avoid brushstrokes.


Cover areas you don't want paint on!

I used a brush to apply purple leather paint (Leather Studio from Joann's) to all the areas I wanted purple.


It took a couple of coats...

(L) Two coats, (R) Just one

Being Harley Davidson boots, they had the Harley logo on them. I used hot glue to fill in all the crevices of the logo, then painted over with Doom Patrol! (I also repeated this logo on his Doom Patrol side bag, for carrying swag around the con).


Lastly, I painted the soles with the silver acrylic:

Like new, only better!

 I approached the gloves the exact same way, with the same paints. Unfortunately, I did not have any old black gloves lying around, so I bought new motorcycle gloves. I tried to get a pair with lots of "sections" to paint, and nice big cuffs.

Thanks Amazon!

One coat of purple

Additional coats of purple. Trying to decide on how to do the wrist strap.

Filled in the wrist strap with silver. All done!

I had grand plans for a moving tentacle arm, but of course these fell through due to time constraints and the fact that I had no idea how to even start with that kind of prop. I settled on a fuzzy animal hand/glove instead, because it was more sewing, less prop-y.

I started with intensely green fun fur. If I had known then how much fun fur I would inhale over the course of the project, I may never have started....


I traced a hand shape out....


... and sewed it into a glove. Yes, it was at that point I realized I didn't need to paint two leather gloves.

The dreaded muppet hand

This was way, WAY too fluffy. I trimmed it a bunch, highlighted it with lime green screen printing ink, and hit it hard with hairspray to avoid inhaling any more fuzz.


On the palm, I used hot glue to hold the fibers down and create a skin texture, similar to a gorilla palm (???). I painted this to match the skin color I was planning on using for BB's make-up.


Last bit was the nails. I bought a set of those plastic "witch fingers" and was planning on removing the nails and attaching to my glove. Unfortunately, I made the glove fingers too short, so I ended up using the entire finger tip to create more space. First I painted the fingers....

Paint does not stick to rubber very well, FYI.

Highlights and shading are important!

...and attached the fingers to the gloves with hot glue (which means the fingers are now falling off, so gotta fix that...)


The last piece was the ears, which were red devil ears that I painted to match everything else. Again, rubber does not take paint very well, so they'll definitely need touch ups later.

Painting

All done!