While it's part of my actual job as a theatrical dresser to maintain wigs for actors, I've never cut and styled a wig before. And I planned on having three for ECCC.
I bought all my wigs and wig-related accessories from Arda Wigs. I highly recommend buying the swatch ring with all the colors. It wasn't very expensive but it was amazingly helpful when it came to deciding which 5 colors I wanted to be in my Starfire wig.
.JPG) |
| Wig stuff monopolizing the dining room table. |
Robin
For Robin, I bought Arda's Jett in natural black, since it would be going on a natural redhead and I didn't want it to be too shockingly different from her pale complexion. Robin didn't need that Snow White look.
 |
| Right out of the bag. |
It was a little long around the back and I wanted to give it some serious styling to get a nice spiky look in the front. For ECCC 2015, we ran out of time and she just wore it right out of the bag. It still looked great!

Raven
.JPG) |
| Soooooo nice. |
It was way too long, especially for something under a cloak.
 |
| Trimming it up |
I took about 6" off the bottom, cutting in some layers so it would be too straight looking. I was too scared to cut any more off at the time.
 |
| With a little makeup practice |
Later, I got crazy with the scissors and thinning shears and went for the full bob. It was a super stressful, very slow process where I snipped here and there over a couple of hours, hoping I wasn't ruining it along the way.
Luckily, with patience and care, I think it actually turned out great!
 |
| The final result! |
Starfire
The biggest wig project by far was Starfire's wig. I began with one wig and four different wig pieces in five colors:
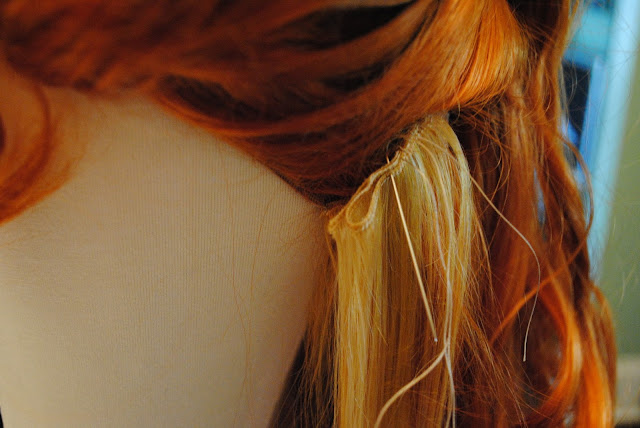
First, I deconstructed the blonde long pony clip and removed the wefts.

I stitched the wefts into the underside of the wig by hand...


...sewing smaller sections up around the sides of the wig.
I braided as I went to avoid tangles later. I still had to curl everything, after all!

The next color was a bright orange, which I stitched on top of the blonde, as well as sewing higher up in the wig so that the oranges were integrated. I wanted to achieve an ombre effect.
In some places, the orange was underneath the smaller blonde side sections, which added to the mixing of the colors.

As I brought the bright orange up around the sides of the wig, I also added in a bit more blonde to add volume to the sides.

Clip up the sections to access the wefts underneath!

I trimmed the bright orange a bit shorter to make sure that enough of the blonde showed.
Before I sewed in the top two layers, I did all the bottom curls. I didn't want to deal with that much hair while curling, if I could help it.
I wanted the curls to also do a bit of a gradient, with the tightest curls at the top and the loosest at the bottom. For the blonde and light orange, I used my flat iron to heat the fibers, and then wrapped them around toilet paper rolls. I wore a double layer of cotton gloves to protect my hands from the heat. Once cool, I removed the rollers to create big wavy curls.


I also mixed in some of the dark orange wig with the light orange, curling those pieces together.

Because the maroon was on a clip, the first step was to take it apart and steal a few of the wefts. I left the rest of the wefts attached to the mesh. Thankfully, the curly clip was already the right amount of curly, so there would be less work later. :D
Lifting up the upper layers, I hand-stitched a few of the wefts on top of the Luthien's wefts.

Then I curled the orange hair at the very top of the wig so that it matched the curl that the maroon hair had. This time, I used hot rollers because they were smaller and would produce the right size of curl. My hot rollers are old and didn't have enough heat on their own, so I heated the hair with my flat iron again before curling it around the roller.

I took the rest of the clip, which I had left in one piece, and sewed in right on top of the wig, starting just behind the bangs.

Basically I just plopped it on top:
The last piece was a set of long clip-in bangs in bright crimson. I left it intact, pulling half the fibers forward to mix into the Luthien's bangs, and bringing the other half back to cover the top of the wig.
The fibers meant for the bangs were pointing the "right" direction, and looked great, but pulling the hair back left an ugly spot where you could see the wefts (see above). It was time to add more wefts and fix it. I laid a weft over the bald spot, with the fibers laying toward the bangs, and hand-stitched it down tightly.

Once it was neatly stitched down, I flipped it the other direction, which covered up the bald spot and created a realistic looking part.

The last bit was curling the crimson hair and blending it with the maroon. Again, I used hot rollers, in an even smaller size.
Once that was complete, I was finally done! I left the bangs straight, and trimmed them to make a simple side-swept look.
And here's the final product, on an actual human (or, Tamaranian, I guess):

Starfire's Post-convention Maintenance:
A wig this huge need a lot of love and care. When we got back from our 10-hour convention day, it was time to pack up the wig for storage. Luckily, the top layers still looked great. I rolled the curls by hand, combing as I went, and pinned them up with bobby pins.

I used a wide tooth comb and a mixture of lotion and water as a detangler.

I separated small pieces of hair, one at a time...
\

...finger-combing out the fibers as much as possible before combing.

If an area was particularly messed up, I used my flat iron to smooth the fibers before rolling it all up. When I was done, it looked like this:
1x Long Bang - Crimson (AR030)
1x Curly Clip - Maroon (018)
1x Long Weft - Fire Orange (AR023)
1x Long Clip Ponytail - Light Blonde (013)
1x Luthien - Pumpkin (AR011)
 |
| All the different pieces! |
First, I deconstructed the blonde long pony clip and removed the wefts.

I stitched the wefts into the underside of the wig by hand...

...then, lifting up the sections of the Luthien as I went, I stitched blonde wefts further into the wig.


The next color was a bright orange, which I stitched on top of the blonde, as well as sewing higher up in the wig so that the oranges were integrated. I wanted to achieve an ombre effect.
 |
| Sewing in the orange |
In some places, the orange was underneath the smaller blonde side sections, which added to the mixing of the colors.

 |
| More stitchin' |
As I brought the bright orange up around the sides of the wig, I also added in a bit more blonde to add volume to the sides.

Clip up the sections to access the wefts underneath!

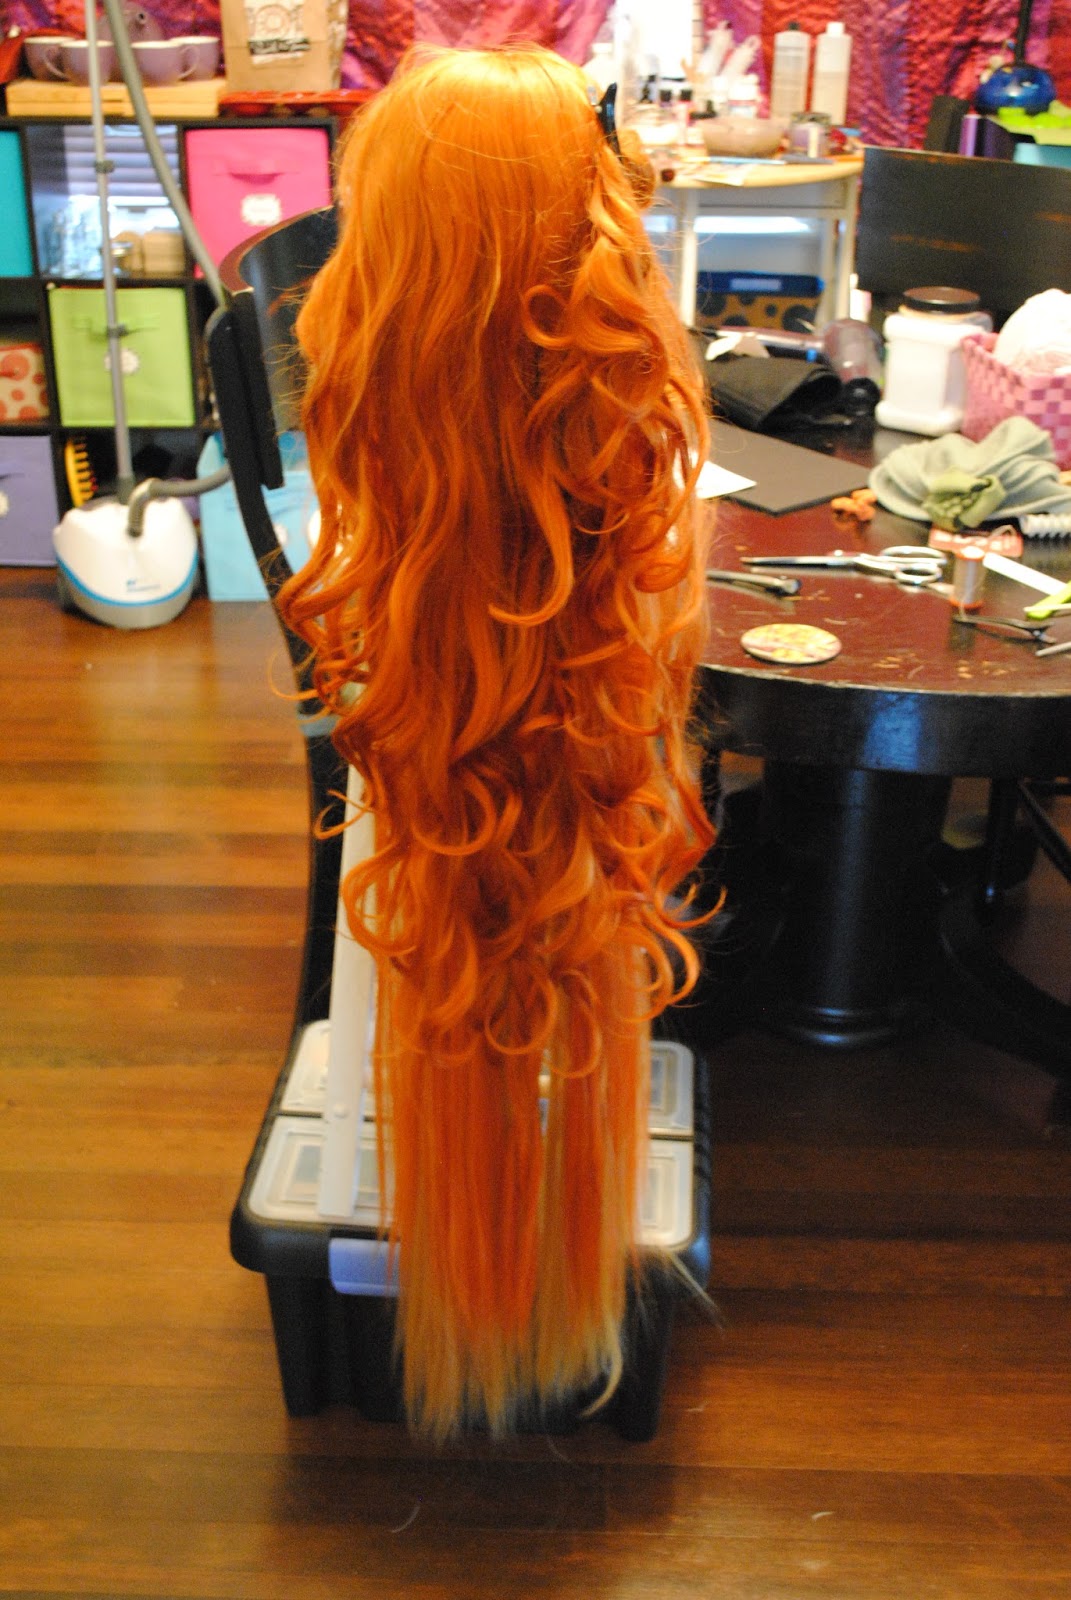 |
| All finished with the first three layers! |
Before I sewed in the top two layers, I did all the bottom curls. I didn't want to deal with that much hair while curling, if I could help it.
I wanted the curls to also do a bit of a gradient, with the tightest curls at the top and the loosest at the bottom. For the blonde and light orange, I used my flat iron to heat the fibers, and then wrapped them around toilet paper rolls. I wore a double layer of cotton gloves to protect my hands from the heat. Once cool, I removed the rollers to create big wavy curls.


 |
| There was A LOT to curl |
I also mixed in some of the dark orange wig with the light orange, curling those pieces together.

 |
| All done with the bottom layers, ready to sew in the red! |
Because the maroon was on a clip, the first step was to take it apart and steal a few of the wefts. I left the rest of the wefts attached to the mesh. Thankfully, the curly clip was already the right amount of curly, so there would be less work later. :D
Lifting up the upper layers, I hand-stitched a few of the wefts on top of the Luthien's wefts.


 |
| With the under-layer of maroon all mixed in. |
I took the rest of the clip, which I had left in one piece, and sewed in right on top of the wig, starting just behind the bangs.

Basically I just plopped it on top:
 |
| With the maroon, from the back. |
The last piece was a set of long clip-in bangs in bright crimson. I left it intact, pulling half the fibers forward to mix into the Luthien's bangs, and bringing the other half back to cover the top of the wig.
 |
| Separating the bangs into two sections. |
The fibers meant for the bangs were pointing the "right" direction, and looked great, but pulling the hair back left an ugly spot where you could see the wefts (see above). It was time to add more wefts and fix it. I laid a weft over the bald spot, with the fibers laying toward the bangs, and hand-stitched it down tightly.

Once it was neatly stitched down, I flipped it the other direction, which covered up the bald spot and created a realistic looking part.

The last bit was curling the crimson hair and blending it with the maroon. Again, I used hot rollers, in an even smaller size.
 |
| All bended! |
 |
| The finished wig! |
 |
| All netted up and ready for the con! |

Starfire's Post-convention Maintenance:
A wig this huge need a lot of love and care. When we got back from our 10-hour convention day, it was time to pack up the wig for storage. Luckily, the top layers still looked great. I rolled the curls by hand, combing as I went, and pinned them up with bobby pins.

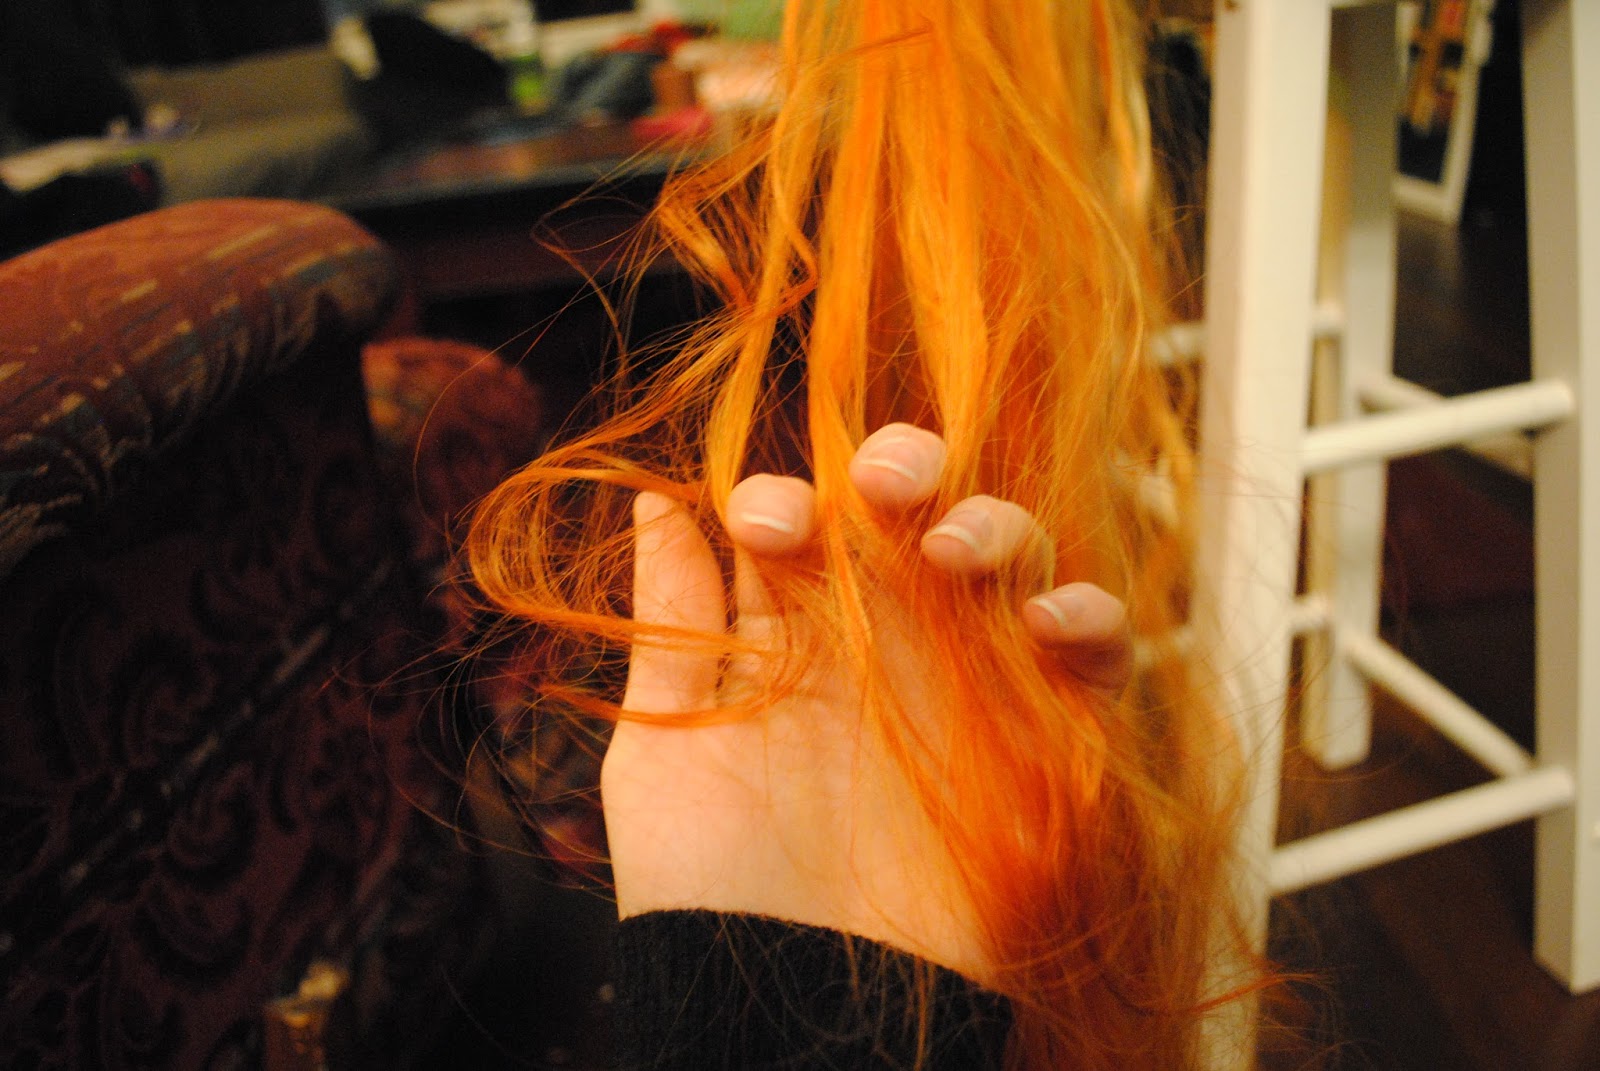
Unfortunately, the bottom layers had brushed up against the back of Starfire's armor, and was, well...
 |
| ...ratty as hell. |

I separated small pieces of hair, one at a time...
\

...finger-combing out the fibers as much as possible before combing.
 |
| Ready for storage! |
No comments:
Post a Comment